
-RATED BY


Built in Canada
All Ecoline windows and doors are built in Ontario, Canada
- Top-of-the-line machinery (Forel, Gracco, Bottero) to produce the best products
- Over 60,000 sq. ft manufacturing plant
- Energy Star-rated and NAFS-11-tested
- Manufactured for local weather conditions
A Step-by-Step Guide on Installing Windows Without Damaging Interior Walls
Apr 10, 2025
7 min read
83
Replacing the old, drafty windows can boost energy efficiency, improve aesthetics, and increase property value. But here’s the catch: if things go sideways, typically due to inadequate tools, sloppy preparation, or rushed techniques, you can end up with costly repairs, messed-up interiors, and project delays.
So, how can you avoid these challenges and swap out old windows without damaging the interior walls? In this quick guide, we’ll walk you through each step of window replacement, highlight the common mistakes, and discuss the best practices and tools to ensure a smooth installation while minimising the potential damage.
How to Replace a Window: Step-by-Step Instructions
Window replacement is a multi-step process that requires accurate measuring and prepping. The methodical approach works best here, while rushing through the process can result in extra hassle.
Step 1: Measure Your Old Window
Before ordering a replacement, get accurate measurements of your current window. Measuring twice should be your motto because even a tiny misstep can result in a misaligned, draft-prone frame. You should run a couple of measurements, including:
- Width: between the inside edges of the window opening at the top, middle, and bottom.
- Height: between the inside edges of the window opening on the left, center, and right.
- Depth: how deep the opening runs.
- Diagonal: top right to bottom left, then the top left to bottom right.
Additionally, take note of obstructions, such as moulding, trimming, drywall, blinds, shutters, or window sill, that can cover part of the actual window opening. Remember, window measurements should be precise. If you feel unsure about whether your measurements are accurate, it’s better to consult with a professional window installer or retailer.

Step 2: Gather Your Toolkit
If it’s not your first DIY project, you probably already have some of the materials and tools at home. However, you’ll have to buy the rest. The essentials include a pry bar, utility knife, screwdriver, hammer, reciprocating saw, caulk gun, shims, tape measure, and level.
As for the materials, you’ll need adhesive flashing tape, spray foam insulation, caulk, trim, nails (or screws), drop cloth, and, of course, the new window. Sprucing up your home can get risky, so don’t neglect using gloves and safety glasses.
Step 3: Prep the Workspace
Before removing or replacing a window, clear the area around it. Move away anything close to the window, including curtains, blinds, furniture, or any wall decor, to avoid bumping into things. Toss down a drop cloth to protect the floors and catch dust and debris. Organise an impromptu workstation — all the tools and materials should be easily accessible.
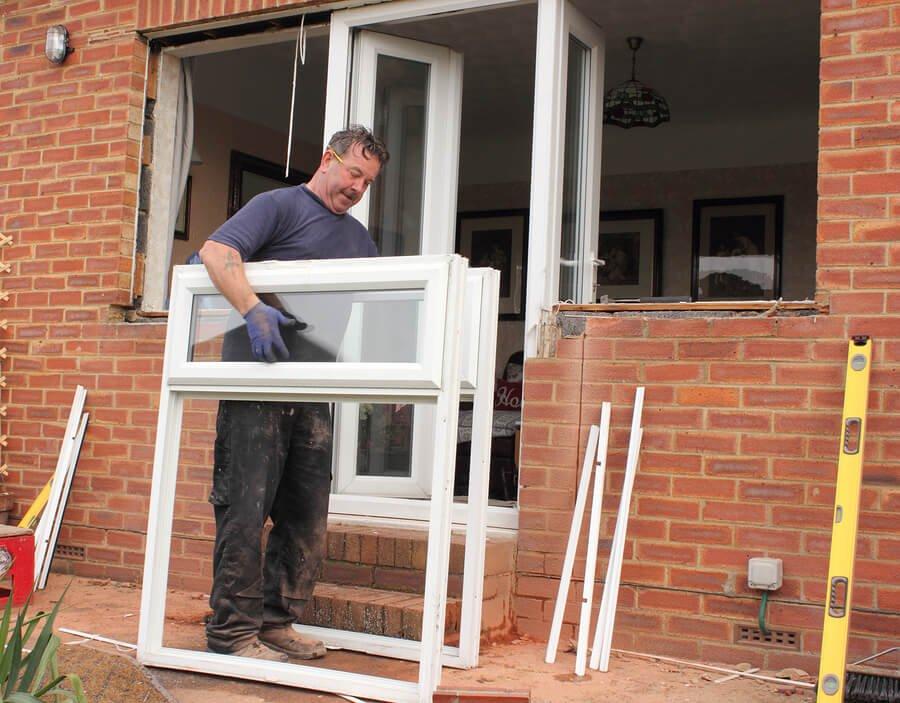
Step 4: Remove the Old Window
Handling the old window (as well as installing the new one) is a struggle when done alone, so ask your pal to help you out. To avoid unnecessary damage, start by running a thin utility knife along the caulk or paint where the window meets the wall.
Next, pop off the inside trim with a pry bar, but don’t press too hard; be extra careful if you want to reuse the trim. Keep in mind that drywall is prone to cracking, so you need to use light-pressure tools. Plaster is notoriously brittle, so cushion the impact with padded pry bars.
When done, it’s time to remove screws (or nails) holding the window in place. Pry the window out of the frame, but take your time to avoid interior wall damage. If the frame refuses to cooperate, it’s time for a reciprocating saw — cut the nails between the frame and wall, but keep the moves shallow so you don’t dig into the drywall.
Step 5: Prep the Window Opening
When installing a window, going slow and measuring twice will save you a future headache:
- First, inspect the window frame for hidden damage, rot, or mould; remove debris and smooth rough edges with sandpaper.
- Second, it’s time to get your measuring tape again — size up the opening to ensure the new window fits snugly. As a rule of thumb, base your fit on the smallest measurement; gaps require shims or further adjustments.
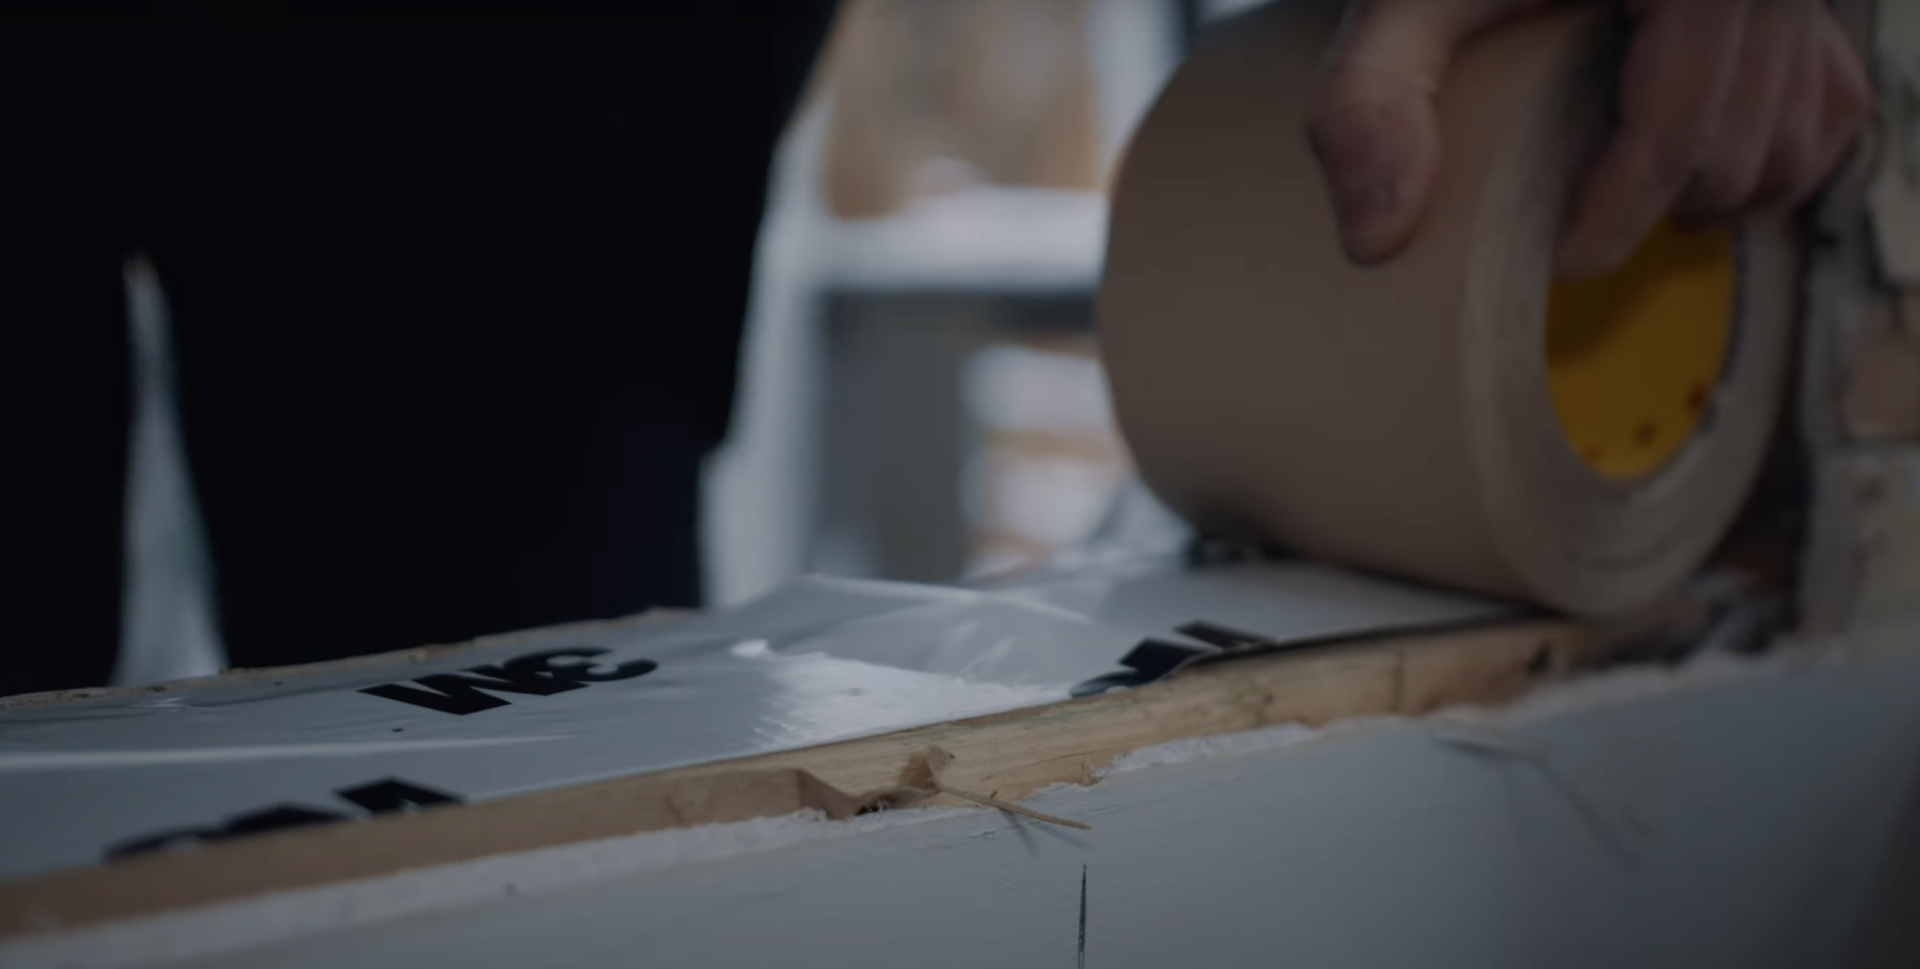
- Third, install the proper flashing — attach the 3M flashing tape on the sill and sides, overlapping with the interior wall to block moisture from leaking inside. Keep in mind that stucco and brick exteriors require extra careful sealing to prevent leakage.
Step 6: Window Installation
Before installing, dry-fit the window to see how it sits, then pull it out. It’s action time! Apply a bead of caulk along the outside edge, slide the window in, and press it firmly into place. To ensure it doesn’t end up crooked, use a level.
Next, secure the window by inserting nails or screws through the pre-drilled holes. Remember to tighten the screws gradually, or you’ll end up warping the frame. Finally, insulate any remaining gaps with low-spray foam — apply the pressure gently and sparingly to avoid pushing on the wall.

Step 7: Wrapping Up
Open and close the window a few times to ensure everything is smooth. You’re at the finish line — all left to do is put back the old trims or cut/order the new ones (wood or vinyl trims are among the most used options). Secure the trim with nails or screws gently, caulk the edges and nail holes, and whip off the extra with a wet rag. After it’s dried, you can sand the rough spots and paint the trim.
And that’s a wrap! If you feel uncertain about your DIY skills, especially when dealing with huge windows, tricky exteriors (brick or stucco), or walls with structural damage, it’s better to contact a professional. They have the necessary tools and expertise to handle the demanding window projects.
Wrapping Up
When it comes to home renovations, swapping out old windows is usually high on any homeowner’s to-do list. To avoid trashing your walls, approach the task methodically: clear the space, prepare the toolkit, ease out the old windows, and install new ones with care.
Little tricks like scouring caulk lines, levelling the window, and flashing will save you a headache. If the project is too complex — brittle walls, huge windows, or structural damage — don’t hesitate to step back and let a professional take over.
Can I reuse the existing trim during a replacement?
Yes, if it’s undamaged and fits the new setup. When removing it from the old window, be careful and label each piece to simplify future assembly. Sand and repaint the trim if it needs a glow-up.
What if I discover hidden damage during the process?
Pause the installation. Even a minor issue can affect the new window’s efficiency. Although you can treat minor rot or mould with wood filler or fungicide, any extensive damage, such as compromised studs, requires a professional.
How do I know if the window is installed correctly?
Make sure it operates smoothly and you don’t run into any issues when opening or closing it. Use a level to ensure it’s not slightly off to the side, and check it for any visible gaps. Inspect walls for cracks or dents and run a simple test — move a candle or incense stick along the perimeter to ensure it’s not drafty.


1750 Coast Meridian Rd #102,
Port Coquitlam, BC V3C 6R8
100, 17866 106A Avenue,
Edmonton, AB, Canada,
T5S 1V3
3307 Dunmore Rd SE #12,
Medicine Hat, AB,
Canada, T1B 3R2
2081 Merivale Rd #201, Ottawa, ON, Canada, K2G 1G9
by appointment only
109 Ilsley Ave Unit #3, Dartmouth,
NS, Canada, B3B 1S8